Template Guide
If you've just purchased the Knots & Craft Webflow Template and are looking for a quick guide on how to start customizing it, you've come to the right place. Follow these simple steps to begin editing and making the template your own.
Getting Started
Thanks for purchasing the Knots & Craft template. In this brief guide we cover all the basics on how to edit basic elements (i.e. colors, fonts, CMS content, etc) from the Knots & Craft Webflow template.If you are not very familiar with Webflow, we highly recommend you to take the Webflow 101 Crash Course from Webflow University, as it will teach you all the basics to get up and running.
Styling
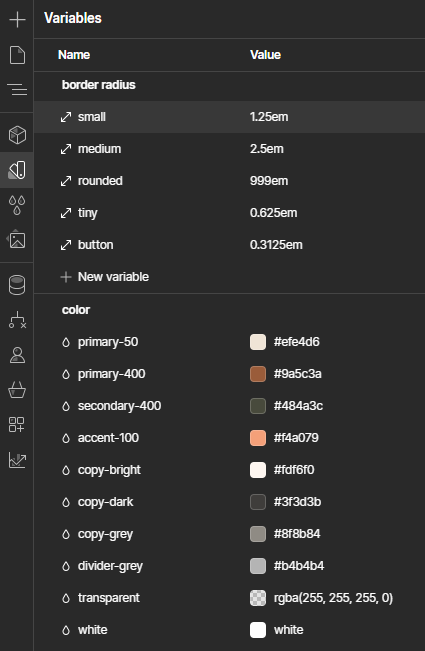
Let's dive into the styling of your Knots & Craft Webflow template. This template is designed to be flexible and easy to customize, thanks to the use of Variables for key elements such as fonts, colors, and spacing.
Fonts | Colors | Spacing
In Knots & Craft, all styling for fonts, colors, and spacing is managed through variables. This dynamic approach means that when you update a variable, the changes will be applied consistently across your entire site—saving you time and ensuring a cohesive look and feel.
To make these changes:
1. Navigate to the Variables (V) Tab in the left sidebar of Webflow’s Designer interface
2. Scroll to the corresponding section (Fonts, Colors, or Spacing) to find the specific variable you want to adjust
3. Simply update the value of the variable, and it will automatically apply the changes site-wide, ensuring a seamless and uniform design
By using variables, you not only streamline the design process but also maintain consistency across your site. It’s a powerful way to ensure all your brand elements—typography, color schemes, and layout spacing—stay perfectly aligned as you edit and scale your website.
Graphics & Icons
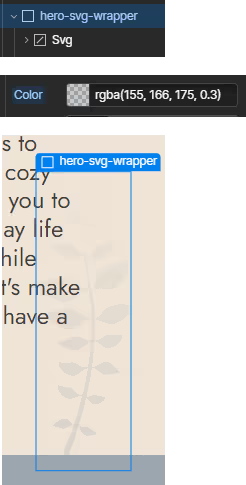
Some icons and graphics are standard image files, which means they won't automatically update when you change the template's colors. These will still retain the original template colors after site-wide updates.
However, most of the icons and graphics in this template are SVGs (Scalable Vector Graphics). SVGs are vector-based, meaning they can be scaled up or down without losing any quality, making them perfect for responsive design. A key advantage of using SVGs is that their colors can be updated dynamically. When you adjust the font size or color of the parent element, the SVG icons inherit these changes, allowing you to easily customize them to match your updated design without manually editing each icon.
However, most of the icons and graphics in this template are SVGs (Scalable Vector Graphics). SVGs are vector-based, meaning they can be scaled up or down without losing any quality, making them perfect for responsive design. A key advantage of using SVGs is that their colors can be updated dynamically. When you adjust the font size or color of the parent element, the SVG icons inherit these changes, allowing you to easily customize them to match your updated design without manually editing each icon.
Edit Pages
Now that you're ready to edit your website, let's go over the next steps for customizing your pages. Typically, you'll be working with two types of content: Static Content and Dynamic (CMS) Content
Here's a breakdown of both:
Here's a breakdown of both:
Static Content
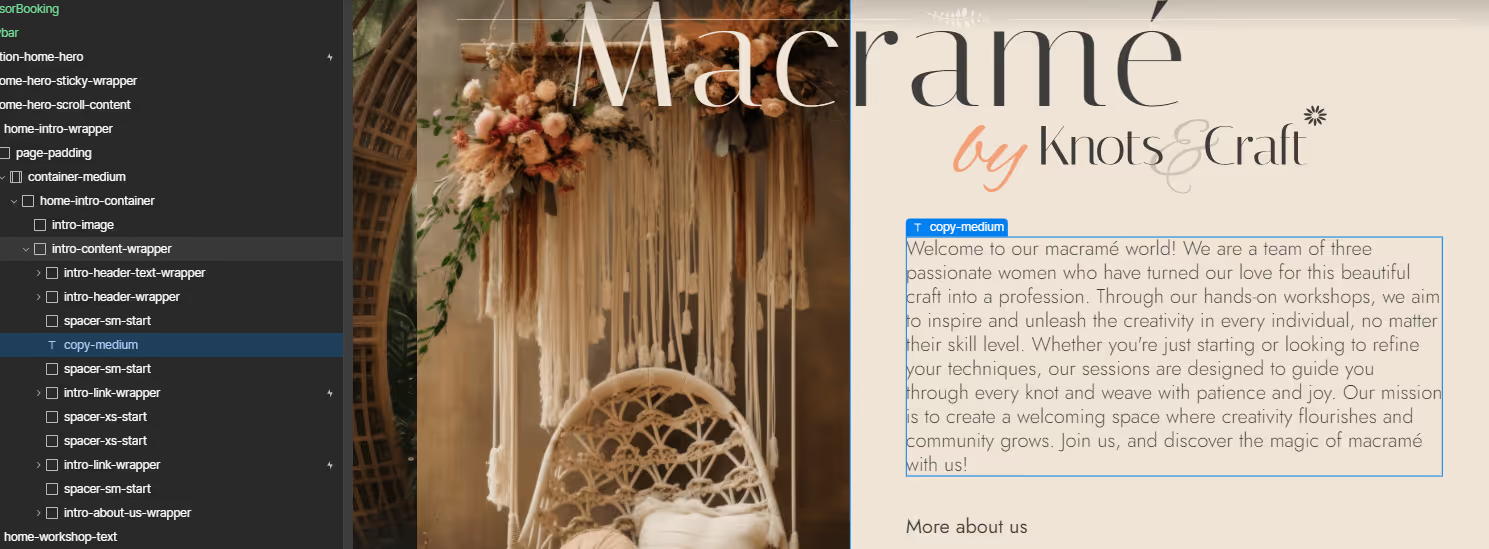
Static content refers to all the elements on your site that are not tied to a dynamic CMS collection, such as regular text, images, and other fixed sections (unlike a blog post, which is CMS-driven).
You can easily identify static content in Webflow’s Navigator (located in the left sidebar), as it appears in grey. When you hover over or click on static elements, a blue border will highlight them.
To edit static content: Simply double-click the element you want to modify. You can then type or make adjustments directly within the element—quick and easy!
Dynamic Content (CMS)
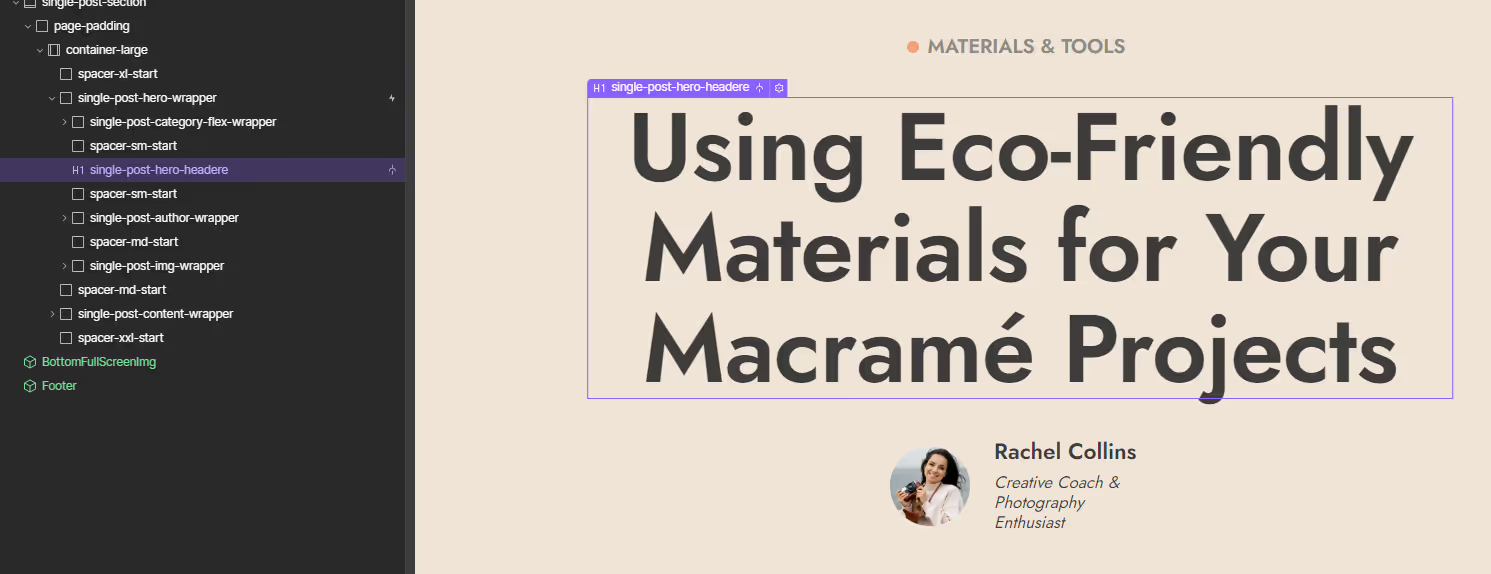
Dynamic content is generated automatically based on the information you've added in the CMS Collections. This type of content is often used for elements like blog posts, portfolios, workshops or any other content that changes frequently.
In the Navigator, dynamic content is displayed in purple, and a purple border will appear when you hover over or select a dynamic element.
To edit dynamic content:
1. Head to the CMS section in the left sidebar, just below the Image Panel
2. All content updates — such as adding a new blog post, new workshops, new colors for the yarn — should be done within the CMS to ensure it's reflected across the entire site.
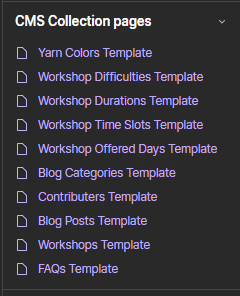
If you need to edit a CMS-driven page (like a blog post template), you’ll find these pages at the bottom of the Pages section in the left sidebar. These are auto-generated templates designed to dynamically pull content from the CMS, making it easy to maintain and update on a regular basis.
You`re All Set!
Now that you’ve got the basics down, you're ready to start customizing the Knots & Craft Webflow template to bring your unique vision to life. With its flexible design, dynamic content management, and intuitive editing tools, the possibilities are endless.